
I got a lot of nice comments on the makeup bags I showed you earlier. And when I made another one yesterday I took some photos of the procedure and now you get to see it. Perhaps you want to make one too. If you do please let me know.
This is a very fast project and you can make one in just a few hours.
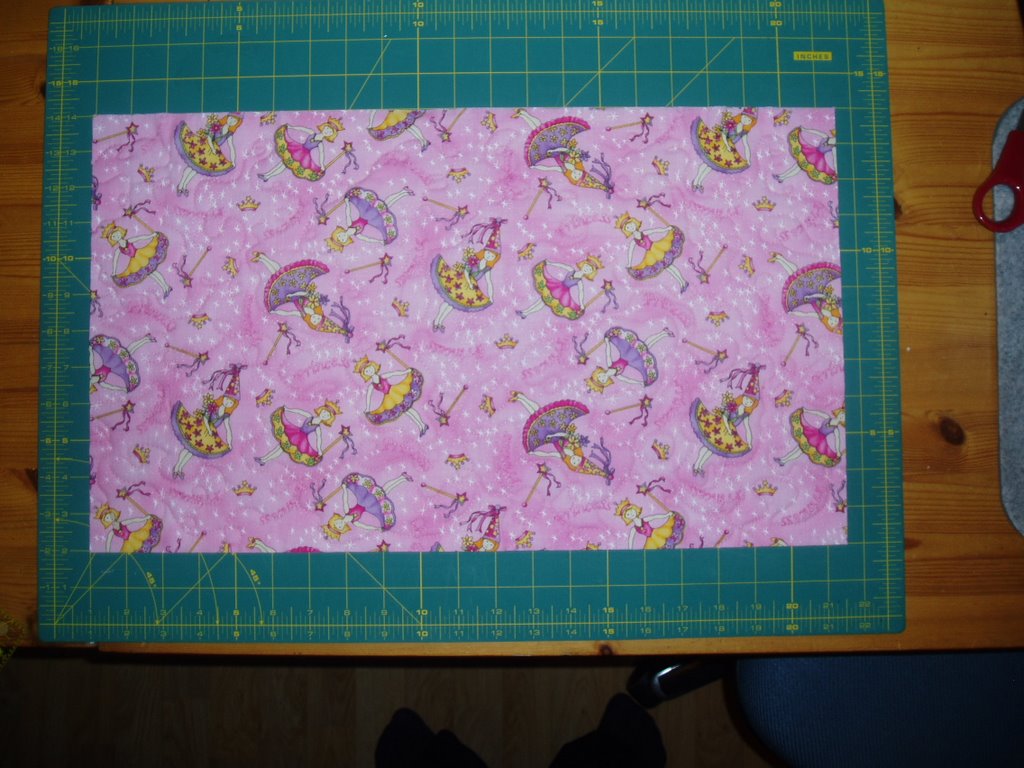
A guess a lot of you have big prints in your stash. They are very nice to use for this bag. Cut the front, batting and back in the same size. Mine measures 20 x 12 inches. If you want a smaller one just cut it smaller or make it bigger if you prefer that. Quilt all three layers together. If you want some applique on it you have to add this now. On the two I made yesterday I appliqued two hearts with buttons on. Use your fantasy!!
 Next step is to sew it together in one side to make a tube. Zigzag the seam allowance.
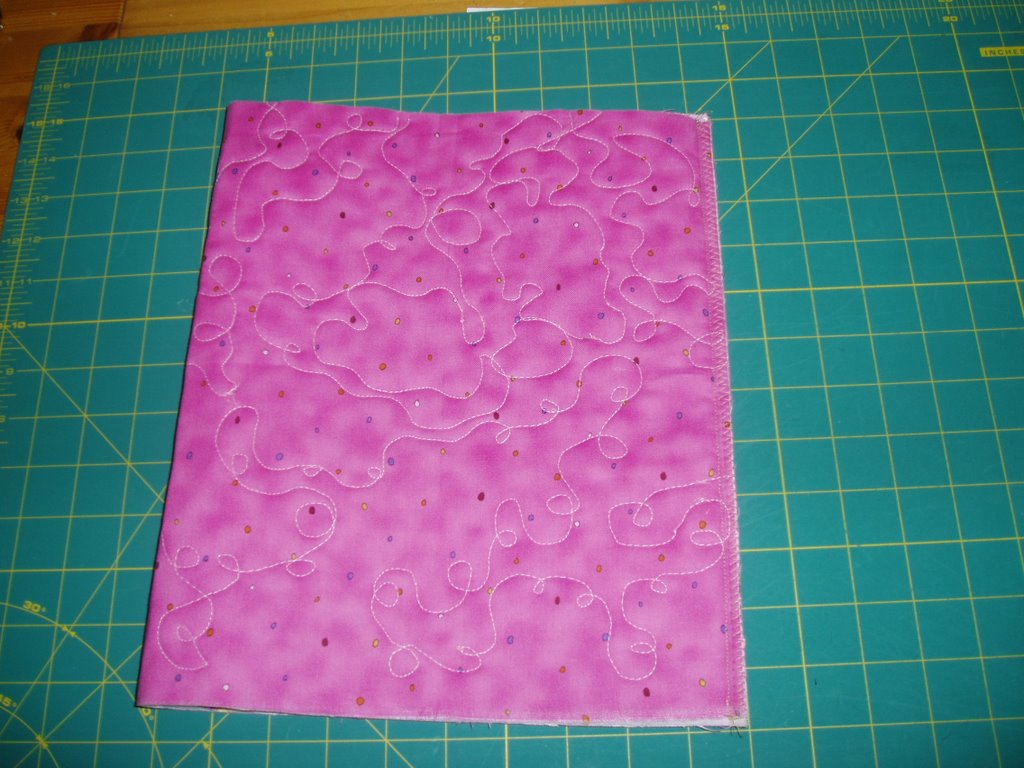 Then fold the bottom like this. Can you see it or do I have to explain it better???
Sew the bottom together and zigzag the seam allowance.
 Turn the right side out.
 The bottom will now look like this.
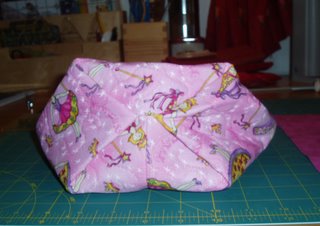 Measure the top of the tube. Mine is 10 inch wide. Cut two pieces of a matching fabric 5 x 11 inches. That is the 10 inch + 1/2 inch on each side that you will fold in. Have you made a bigger og smaller bag you have to measure your bag and add 1 inch.
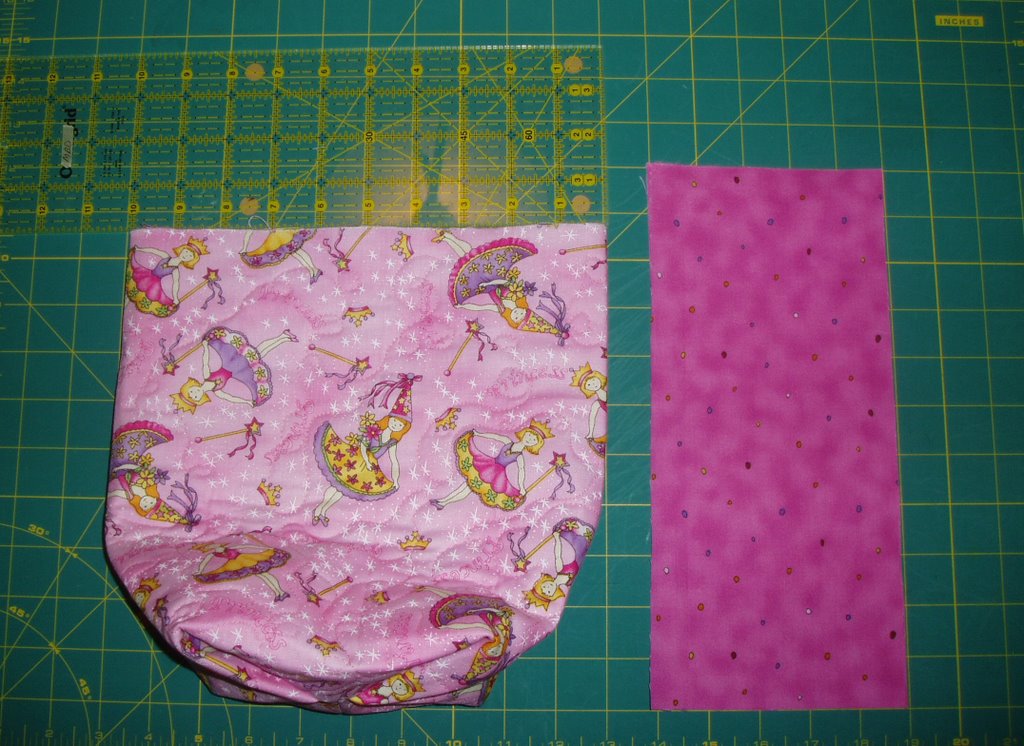 Fold all the sides as on the photo and sew. Then iron it with wrong sides in. Sew a line one inch from the fold on both.
 Then pin it on the bag like this and sew.
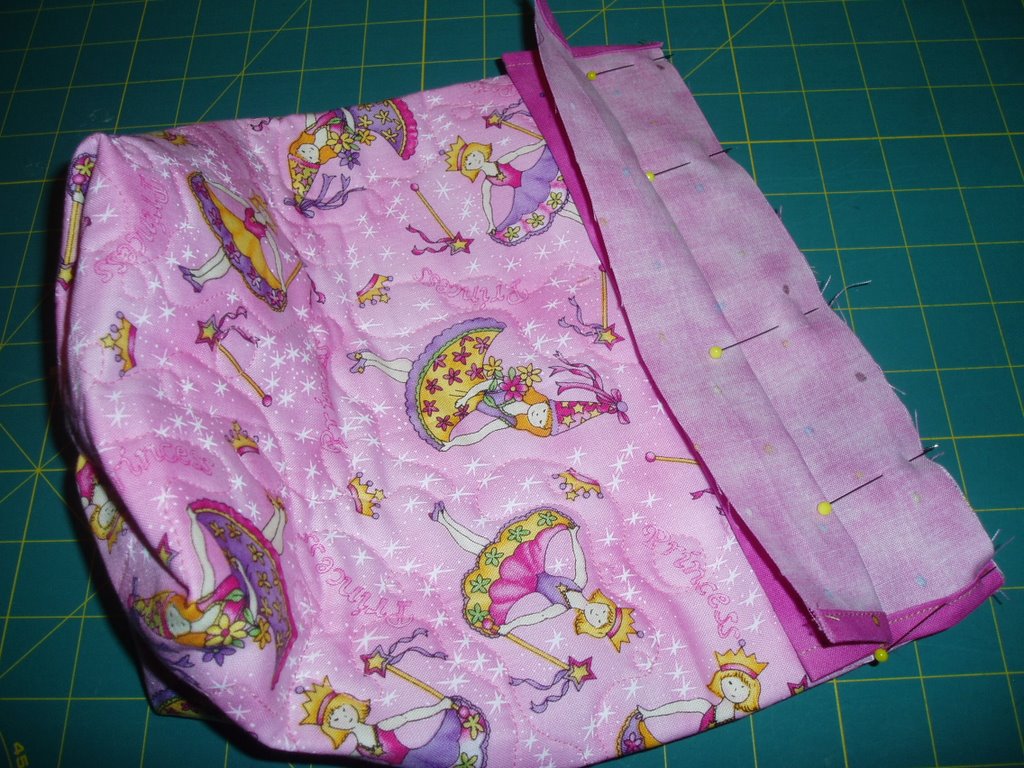
Then you have to stitch it down on the wrong side by hand. And sew a line on the front to hide the seam allowance.
Make two cords to lock the bag and voila........you got a new bag.

This is probably the most horrible sewing procedure you have ever read. Hope you will be able to understand. It is one thing to make it in Norwegian, another thing to translate it to understandable english LOL And please if you can help me to explain this in a better way please let me know.
If you choose to make one please let me know. And show it on your blog. This can be a very nice present for christmas. The one I have made now is for a little 3 year old girl. She had to have princess fabric. I will add some bathfoam and lotion for her.....I think. A teenager would probably love to get makeup in her bag. For boys I would probably add something else.
I have added this makeup bag on the sidebar if you want to make it later.
30 comments:
Great tutorial and very easy to understand! I might make one for Aine and Aisling to carry their "my litte pony" or barbies in!
Thank you for the tutorial - I might have to make some for my nieces.
You make it sound so easy. Maybe I will try it tomorrow. I got other plans for today....
Sorry for not being able to help you put it on the sidebar. I'm still struggling to get link to your blog on the side in mine....
Very easy to understand, great pictures and how-tos!
Thank you for the tutorial, the bags are adorable.
Thanks for the instructions. Looks like a fun and easy project.
Thank you so much, May Britt! I can't wait to go give it a try. :D I think you did a great job with explaining it. :) I hope someone comes along to visit your blog that can tell you how to put it in your sidebar...
Thank-you for the tutorial. I am going to keep it in mind for holiday gifts.
Thank you for this tutorial ! the fabric you choose is very charming for a little girl. Thank you for visiting my blog !
It is a really cute little bag. I understood your tutorial perfectly. I will make one and when I do I will post it for you to see. Thank you
Pam
Thanks for the instructions May Britt, you make it sound so easy.
Jodie
Thanks May, great tutorial. You make it look 'sew' easy. LOL. Very cute bag!
i'm sure the little girl will love the bag. Such pretty fabric. Thanks for showing how to make it. I think i will make two in Christmas fabrics for the girls. Hopefully i will have time on the weekend. I'll let you know when they are done.
It is cute as pie, and you make it seem possible -- but you don't know my sewing!
Very cute May Britt. I might have to give it a go.
Thanks May, this is a lovely item to make for my daughter for Christmas! Many thanks for being generous with sharing. Hugs Sandie
No, very understandable, and great pictures!
I think you have done a very good job with your directions. I like this bag very much and can see it being used for so many different things. Made in "man" fabrics/colors it would make a nice bag for a shaving kit. And it could be made up in Christmas novelties in different sizes and used as gift wrap.
Oh this is adorable! And how fast and easy! I love the cord closing idea! Thanks for showing it!
How clever of you and I'll have to study this a little more closely when I have a bit more time. Love the pink you used!
Så flott det hjerte av sekskantene ble. Fint stoff du har brukt også. Jeg likte spesielt rosestoffet, men alt passet så fint sammen.
Mønsteret på løperen jeg har sydd er delvis selvkomponert. Jeg har bare henta inspirasjon fra crabe apple hill til blomsterranken og teksten. Jeg har link til siden deres under INSPIRASJON. De har veldig mye fint.
Oi, er jeg den eneste som skriver på norsk her??
Thanks May, great tutorial. You make it look very easy... Very cute bag!
Great job! I make a lot of little bags, fairly similar but usually with a paper bag type bottom, I will be very keen to gice yours a go. I loved your instuctions, your English is great, thanks for sharing. I'll post some of mine if I can get them out of a few little girl's hands!
Great tutorial May! Thanks so much for sharing.
I'm like you - really thinking about switching to Beta because so many are now "no reply". I'm still afraid I'll lose stuff and screw up my template, so I'm dragging my feet.
Love your new look! Cathi is a real sweetheart isn't she!
Thank you very much for your tutorial!!!!!
Grazia
ok i love it!especially the part where you make a rectangular bottom. i do rectangular bottoms another way, but now i think yours is easier and pretty clever. i have to ask though, is the inside of your bag lined with a fabric lining or the interfabric lining (the white one)?
here, just wanted to say that I really like your tutorial. Am making a bag at the minute, though for a different purpose and altering a little bit towards the end. Still great tutorial and will provide a link when I write up a blog post :)
Cheers
Steph
http://stephcuddles.wordpress.com/
Post a Comment